8 Essential Stage Plot Examples and Templates for 2025
Master your live setup with our 8 essential stage plot examples. Get free templates and pro tips for bands, solo artists, and DJs for a flawless show.
December 6, 2025
Music Marketplace Advisor
Buying & SellingA well-crafted stage plot is more than just a diagram; it's the master key to a smooth, professional, and stress-free live performance. It serves as your direct line of communication with the sound engineer, the venue manager, and the entire technical crew, ensuring everyone is perfectly aligned before you even strike a single note. A clear, accurate stage plot eliminates hazardous guesswork, dramatically speeds up your soundcheck, and prevents common on-stage mishaps. This critical document allows you to focus entirely on what you do best: delivering an unforgettable show for your audience.
In this comprehensive guide, we will break down a curated collection of essential stage plot examples, covering setups from solo acoustic acts to complex, full-band arrangements and DJ configurations. For each example, you will find detailed analysis, strategic insights, and actionable takeaways that you can apply immediately to your own setup. We provide downloadable templates for each configuration, empowering you to create professional-grade documents quickly and efficiently.
This resource is designed to be a definitive reference for artists at every level. Whether you are a touring veteran refining your technical rider or an emerging artist booking your very first gig, mastering this crucial pre-production document will elevate your professionalism and set the stage for consistent success. By understanding and implementing the principles behind these stage plot examples, you will transform your pre-show communication from a potential source of anxiety into one of your most powerful professional assets. Let's dive in and explore the blueprints for a flawless live show.
1. Thrust Stage Configuration
A thrust stage configuration is a unique performance setup where the stage extends, or "thrusts," into the audience, with seating on three sides. Unlike a traditional proscenium stage, which creates a distinct separation between performers and spectators, the thrust stage fosters a more intimate and dynamic connection. This design brings the action closer to the audience, allowing for a shared, immersive experience from multiple viewpoints.
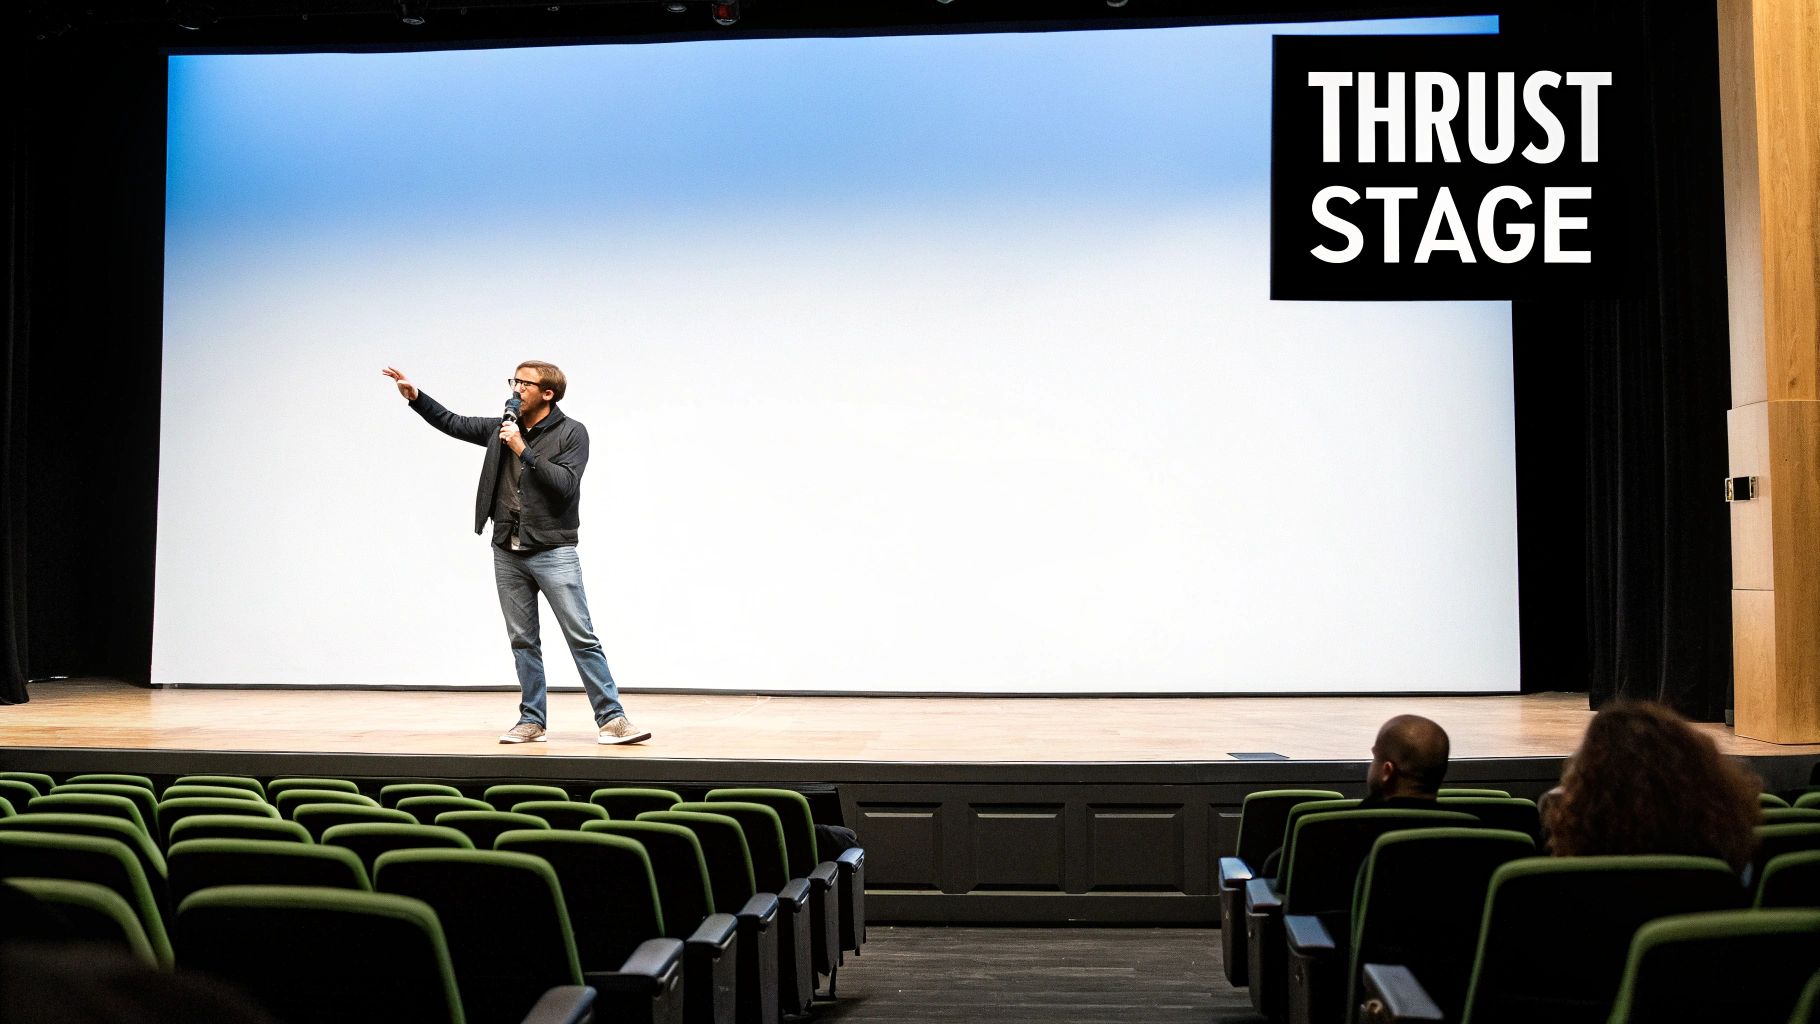
While originating in classical theater, like Shakespeare's Globe, this setup offers significant benefits for modern musicians and speakers. The close proximity allows for powerful audience interaction and engagement, making it ideal for acoustic sets, spoken word performances, or any act that thrives on a direct connection with its audience.
Strategic Analysis and Application
The primary challenge and strength of a thrust stage is its multi-angle visibility. A successful stage plot for this configuration must account for sightlines from the front, left, and right, ensuring no section of the audience feels excluded. This requires a different approach to equipment placement and performer movement compared to a standard end-stage setup.
For musicians, this means positioning monitors, amps, and microphone stands to minimize visual obstruction. Performers must be conscious of their "open" and "closed" body language relative to all three audience sections, often requiring more dynamic movement and rotation throughout the performance.
Key Takeaway: The goal of a thrust stage plot is not just technical accuracy but choreographed visibility. Every piece of gear and every performer's position must be considered from a 270-degree perspective to maximize audience engagement and maintain a clean, professional appearance from all angles.
Actionable Tips for Thrust Stage Plots
To create effective stage plot examples for a thrust configuration, focus on balance and minimalism.
- Centralize Key Elements: Place the lead vocalist or primary focal point near the center of the thrust to command the widest possible view.
- Use Low-Profile Gear: Opt for floor monitors instead of side-fills where possible, and keep amp stacks and other bulky equipment toward the upstage (back) wall.
- Map Performer Zones: Your plot should indicate general movement zones for each performer to ensure they actively engage with all three sides of the audience throughout the show.
- Verify Sightlines: During soundcheck, have someone walk through the seating areas to check for obstructed views. Adjust gear placement accordingly. This simple step can dramatically improve the audience experience.
2. Proscenium Arch Configuration
A proscenium arch configuration is the most traditional and widely recognized stage setup, where the performance area is framed by a large architectural arch. This design creates a distinct "picture frame" effect, separating the stage from the auditorium and focusing the audience's view onto a single, controlled perspective. Found in most Broadway-style theaters like the Kennedy Center and the Royal Opera House, it establishes a clear fourth wall between the performers and spectators.
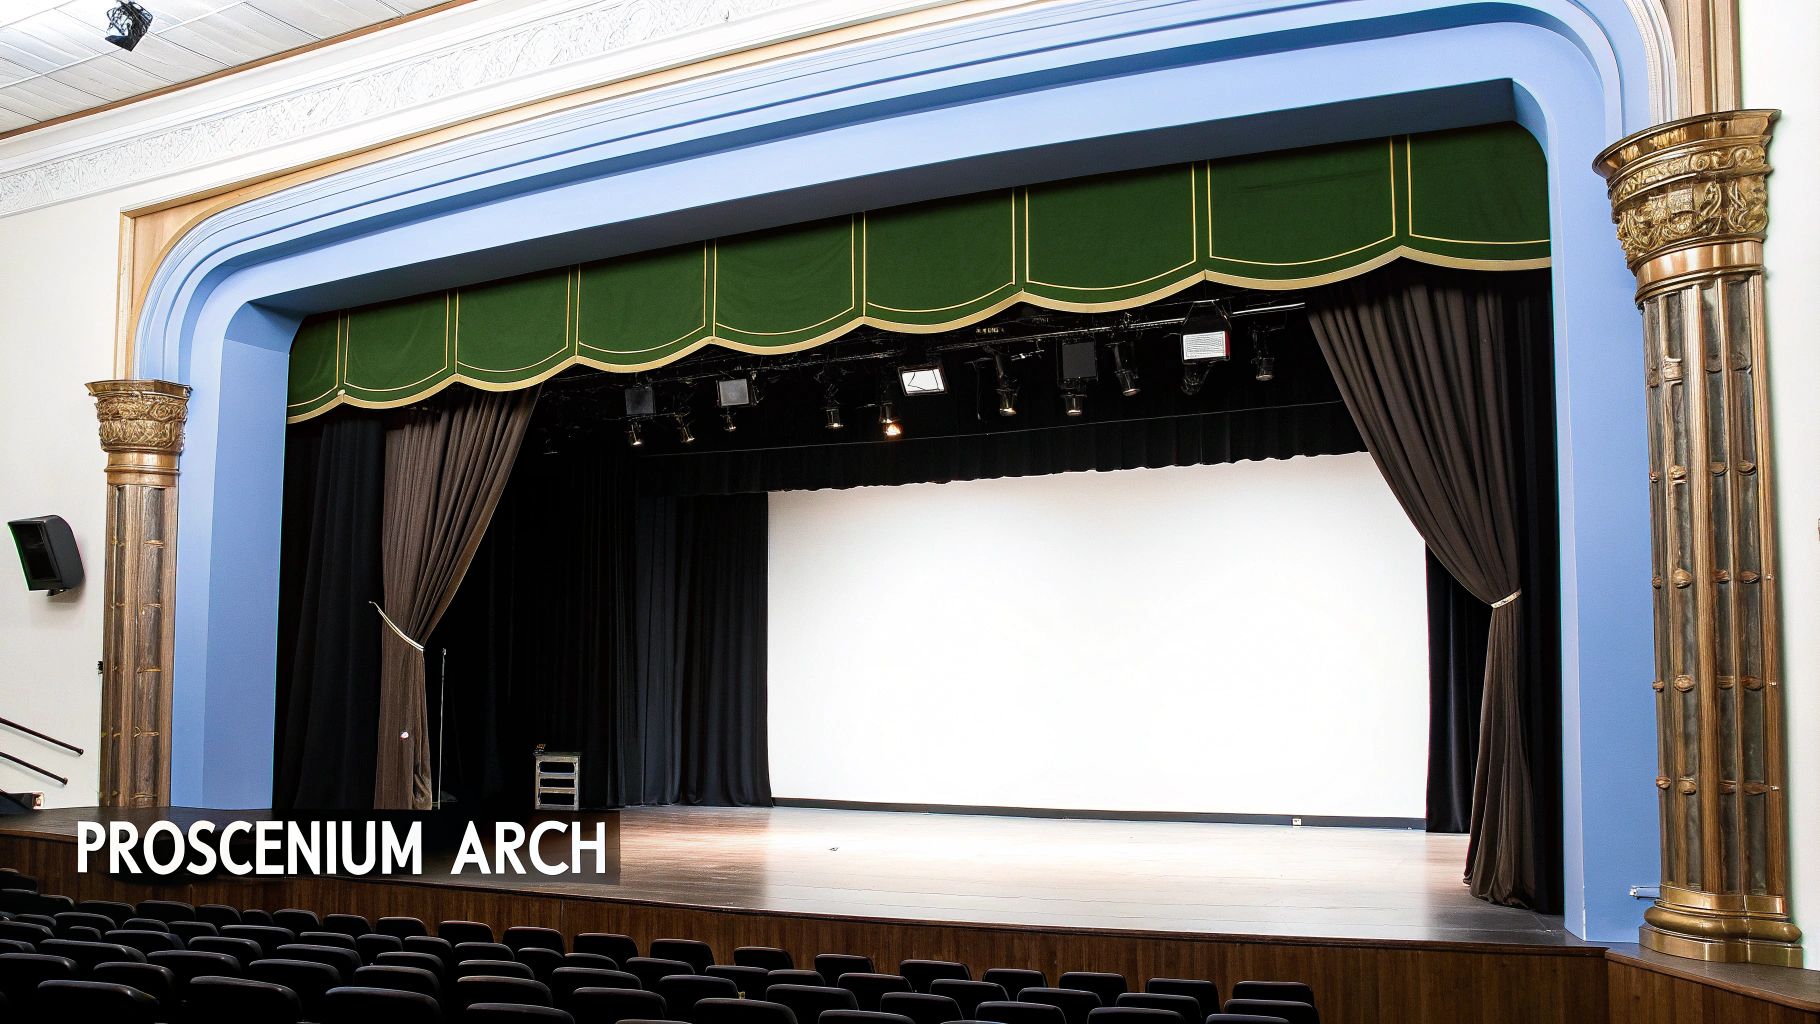
This setup offers unparalleled control over the visual and auditory experience. The defined space is ideal for elaborate set designs, lighting effects, and sound management, as technical elements can be hidden in the wings, fly space, and orchestra pit. For musicians, this means a controlled sonic environment where sound can be precisely directed toward the audience without the bleed and sightline issues of more open stages.
Strategic Analysis and Application
The primary strength of a proscenium stage is its ability to direct focus and conceal technical mechanics. A successful stage plot for this configuration leverages the offstage areas (wings, upstage) to maintain a clean, uncluttered performance space. Unlike a thrust stage where equipment must be managed from multiple angles, the proscenium allows for larger backline gear, side-fill monitors, and technical stations to be completely hidden from view.
This design encourages a forward-facing performance. The stage plot should be organized with a clear understanding of depth, placing key performers downstage (closer to the audience) and arranging other band members and equipment in layers behind them. This creates a visually appealing composition and ensures optimal sound projection from a single frontal direction.
Key Takeaway: The goal of a proscenium stage plot is to maximize visual impact through controlled perspective and depth. Every element should be placed to create a powerful, polished "picture" for the audience, utilizing the wings and backstage space to hide all technical distractions.
Actionable Tips for Proscenium Stage Plots
To develop effective stage plot examples for a proscenium setup, focus on composition and technical concealment.
- Utilize Stage Depth: Arrange your band in layers. Place the lead vocalist front and center, with rhythm sections (drums, bass) upstage and other musicians filling the mid-stage area.
- Keep Wings Clear for Tech: Your plot should clearly designate space in the wings for monitor worlds, guitar techs, and other crew, ensuring they are out of the audience's sightline.
- Specify Monitor Needs: Since sound is directional, be precise about monitor placement. Your plot can include a mix of floor wedges for front-line performers and side-fills for overall stage volume without cluttering the view.
- Plan for Backdrops and Lighting: Acknowledge the potential for backdrops, video screens, and a fly system in your plot. Position your gear to avoid interfering with lighting trusses or set pieces that may be lowered from above.
3. Arena Stage (In-the-Round) Configuration
An arena stage, also known as theater-in-the-round, is a performance space where the audience surrounds the stage on all four sides. This configuration completely removes the traditional backstage area and breaks down the barrier between performers and spectators, creating a highly communal and immersive atmosphere. The action is placed at the very center of the environment, making the audience feel like an integral part of the performance.
While a staple in experimental theater, this setup is famously used by major touring acts like U2 and Metallica to create unforgettable concert experiences. It offers an unparalleled sense of intimacy in a large venue, ensuring every audience member has a unique and close-up perspective. This format is ideal for performers who thrive on 360-degree energy and engagement.
Strategic Analysis and Application
The defining challenge of an arena stage is the complete lack of a "backstage" or a primary focal point. Every move, every piece of equipment, and every technical element is visible from all directions. A successful stage plot must therefore be meticulously planned for 360-degree sightlines and audio coverage, turning a potential weakness into a unique strength.
For musical acts, this means a radical rethinking of gear placement. Monitor wedges are often placed in a circle facing inward, drum kits may be on rotating risers, and cables must be managed flawlessly to avoid tripping hazards and visual clutter. Performers must remain constantly in motion, engaging with all sections of the crowd to avoid showing their back to one area for too long. For artists looking to expand their reach, considering the 360-degree view is also vital when thinking about the benefits of live streaming performances, as it creates a dynamic visual for remote viewers.
Key Takeaway: An arena stage plot is an exercise in total spatial awareness. The design must prioritize transparent logistics, fluid movement, and equitable engagement, making the performance feel inclusive from every seat in the house.
Actionable Tips for Arena Stage Plots
Crafting effective stage plot examples for an in-the-round setup requires a focus on minimalism and dynamic movement.
- Embrace Rotational Blocking: Plan performer movements in circular or rotating patterns. Your plot should indicate these paths to ensure all audience sections receive attention.
- Utilize a Central Hub: Place shared elements, like a drum riser or main console, at the true center to act as an anchor point for the rest of the setup.
- Prioritize Clean Cable Management: Use stage-floor cable troughs or run power and audio lines from a central drop in the ceiling grid to keep the performance area clear and safe.
- Plan Multiple Entry Points: Your plot must clearly define multiple entrances and exits for performers, often through aisles in the audience, and ensure these paths are always kept clear.
4. Black Box Configuration
A black box configuration refers to a simple, unadorned performance space, typically a square or rectangular room with black walls and a flat floor. Its defining feature is flexibility; the stage and seating are not fixed, allowing them to be reconfigured into proscenium, thrust, arena, or other custom layouts for each unique production. This adaptability makes it a favorite for experimental theater, intimate concerts, and university arts programs.
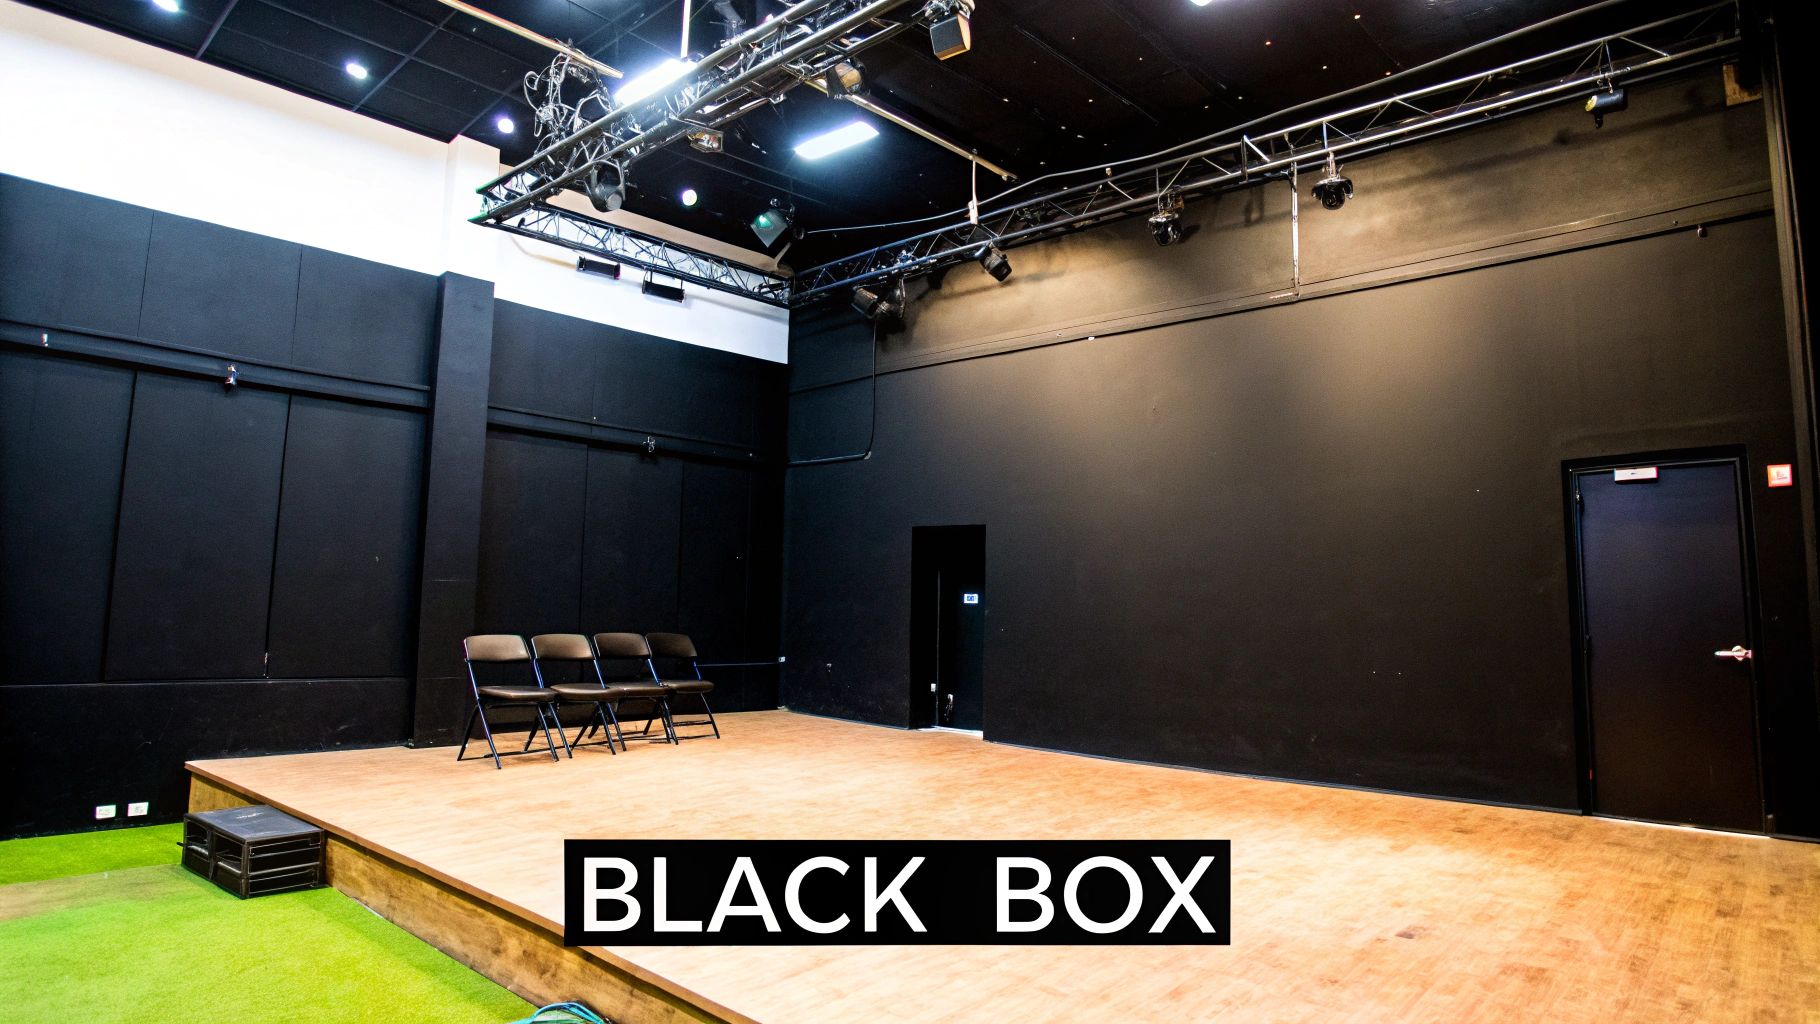
This "blank canvas" approach puts the creative focus entirely on the performance. For musicians, it offers an opportunity to craft a completely bespoke environment, controlling the audience's proximity and perspective. Spaces like New York's The KITCHEN have used this model to present groundbreaking work that wouldn't fit a traditional venue, a key strategy for artists navigating how to get into the music industry on their own terms.
Strategic Analysis and Application
The greatest advantage of a black box is also its main challenge: total freedom. Without a pre-defined stage, your stage plot becomes the primary architectural document for the entire event. It must dictate not only where the band and gear go but also where the audience will be and how the performance space is defined within the room.
This requires a holistic view of the event experience. The plot must work in tandem with the lighting design, sound reinforcement, and even entry/exit points for the audience. The goal is to create a cohesive and immersive world from scratch, where every technical element serves the artistic vision.
Key Takeaway: In a black box, the stage plot transcends technical planning; it becomes an act of environmental design. The plot must define the performer-audience relationship by establishing the very shape and flow of the performance space itself.
Actionable Tips for Black Box Stage Plots
To develop effective stage plot examples for a black box, think like a director and an architect.
- Define the Stage First: Begin your plot by drawing the stage area and audience seating arrangement. This fundamental decision will dictate all subsequent gear placement.
- Utilize Modular Gear: Plan for portable risers, flexible lighting rigs, and a PA system that can be easily reconfigured. Your plot should specify the dimensions and placement of any modular staging.
- Plan Cable Management: In an open, flexible space, messy cables can be distracting and dangerous. Your plot should include a detailed plan for running power and audio lines cleanly, often using gaffer tape to create safe pathways on the floor.
- Communicate the Vision: Since the venue staff is building the space based on your document, use clear labels and a detailed key. Add notes explaining the desired audience experience (e.g., "intimate, in-the-round setup").
5. End Stage Configuration
An end stage configuration is the most common and straightforward performance setup, where the stage is positioned at one end of a rectangular space with the audience facing it directly. This classic layout, often found in school auditoriums, community centers, and corporate event spaces, creates a clear and traditional separation between the performers and the spectators. The audience views the performance as if looking through a frame, which simplifies production and focus.
This setup is highly practical for a wide range of events due to its simplicity and efficiency. For musicians, it allows for a conventional front-facing audio setup where sound can be projected directly toward the audience. It is the default configuration for most multipurpose venues where flexibility and ease of setup are paramount.
Strategic Analysis and Application
The primary strength of an end stage is its controlled, frontal perspective, which simplifies sightlines and sound design. However, this can also be a limitation, as it can create a more passive viewing experience compared to more immersive setups. A successful stage plot for this configuration must optimize this direct line of sight and sound, ensuring maximum impact for every audience member, from the front row to the back.
For bands, this means arranging equipment logically, with the rhythm section typically upstage (back) and lead performers downstage (front). The placement of speakers and monitors is critical to achieve even audio coverage throughout the rectangular space without creating feedback or overly loud hotspots in the front rows. The entire performance is presented from a single, unified viewpoint.
Key Takeaway: The goal of an end stage plot is optimized projection. Every element, from speaker placement to performer positioning, must be planned to deliver a clear, powerful, and balanced audio-visual experience directly to a static, front-facing audience.
Actionable Tips for End Stage Plots
To develop effective stage plot examples for an end stage, focus on clarity, coverage, and visual hierarchy.
- Elevate for Visibility: Use risers or platforms for drummers, keyboardists, or other seated musicians to ensure they are visible beyond the front line of performers. This creates visual depth and improves sightlines for those in the back.
- Position Speakers for Coverage: Your plot should specify the placement of main PA speakers, often on either side of the stage, angled slightly inward to cover the entire seating area. Note any potential viewing "dead zones."
- Create Visual Focus: Arrange performers and key equipment to draw the audience's eye to the main focal point, typically the lead vocalist. A symmetrical or purposefully asymmetrical layout can add visual interest.
- Plan Your Backline: Clearly map out the "backline" (amps, cabinets, and large gear) along the upstage wall. Ensure there is enough space between items for performers to move and for technicians to access cables.
6. Traverse Stage Configuration
A traverse stage configuration, also known as an alley or corridor stage, is a unique setup where the performance area is situated lengthwise, with the audience seated on two opposite sides. This arrangement creates a long, narrow playing space, similar to a fashion show runway, and forces the audience to view not only the performance but also the reactions of the spectators on the other side. This dynamic establishes a distinct, often confrontational, and highly engaging atmosphere.
While common in experimental theater and educational settings, such as at The Royal Exchange Theatre in Manchester, the traverse stage presents interesting possibilities for musicians. It is particularly effective for narrative-driven performances, concept albums, or any act that benefits from a strong sense of opposition or connection between two halves of a room. The direct sightline across the stage makes the audience an integral part of the visual landscape.
Strategic Analysis and Application
The core challenge of a traverse stage is its dual-fronted nature. Performers are constantly "in profile" to at least one side of the audience, eliminating the concept of a traditional front-and-center position. A stage plot must therefore prioritize symmetry and ensure that the experience is balanced for both seating banks, preventing one side from feeling neglected or seeing only the backs of performers.
For musical acts, this demands careful placement of microphones, monitors, and backline equipment. Gear is often positioned at the far ends of the stage or minimized to maintain clear sightlines down the entire length of the performance area. Performers must develop a keen awareness of how their movements and positioning play to both sides simultaneously.
Key Takeaway: The objective of a traverse stage plot is balanced engagement. Every technical and performance decision must serve both audiences equally, transforming the challenge of dual-frontedness into a unique and powerful theatrical strength.
Actionable Tips for Traverse Stage Plots
To develop effective stage plot examples for a traverse stage, think in terms of parallel lines and balanced action.
- Utilize the Ends: Place static elements like drum kits or keyboard rigs at the far ends (upstage/downstage) of the corridor to keep the central performance area clear.
- Create Symmetrical Monitor Mixes: Ensure performers have consistent sound monitoring regardless of which side they are facing. This often requires more individual monitor mixes.
- Block for Duality: Your stage plot should indicate movement patterns that play to both sides. Encourage performers to use the entire length of the stage and alternate their focus.
- Minimize Scenery and Backline: Keep the central playing space as uncluttered as possible. Use low-profile amplifiers and cabling solutions to avoid creating visual barriers.
7. Flexible Modular Stage Configuration
A flexible modular stage configuration utilizes portable, interlocking platforms, risers, and components that can be assembled in countless shapes and sizes. This modern approach to staging frees performers and production managers from the constraints of a fixed venue architecture. It allows for the rapid creation of custom performance spaces, combining elements of proscenium, thrust, arena, or entirely unique layouts as needed for a specific event.
This adaptability makes modular systems invaluable for touring productions, corporate events, and multi-use venues like university theaters or convention centers. For an artist, a modular stage means the performance environment can be tailored to the show's specific narrative or technical needs, rather than the other way around. This opens up creative possibilities for audience interaction, equipment placement, and visual design.
Strategic Analysis and Application
The core advantage of a modular stage is its versatility, but this also presents its primary challenge: planning. Unlike a fixed stage, every element must be specified in the stage plot, from the dimensions of each platform to the location of stairs and railings. The plot becomes less of a map and more of a comprehensive blueprint for construction.
For a touring band, this means the stage plot must be exceptionally detailed, including weight loads for heavy equipment like drum risers and lighting rigs. The success of the setup hinges on clear communication between the artist's production team and the local crew responsible for assembly. Creating strong professional connections is crucial for ensuring these complex setups are executed correctly, a skill highlighted by the importance of networking in the music industry.
Key Takeaway: The goal of a modular stage plot is prescriptive precision. It must serve as a complete assembly guide, leaving no room for ambiguity, to ensure the physical stage is built safely and exactly to the creative vision of the performance.
Actionable Tips for Modular Stage Plots
To develop effective stage plot examples for a modular configuration, focus on detail and documentation.
- Create Standardized Templates: If you frequently use modular setups, develop a set of pre-designed configuration templates for different show sizes (e.g., "small club setup," "festival setup") to streamline planning.
- Use a Component Legend: Your plot must include a clear legend identifying each type of modular piece (e.g., 4'x8' platform, 12" riser, safety rail).
- Document Assembly Steps: For complex designs, supplement the plot with a separate document outlining the step-by-step assembly process to ensure local crews can build it efficiently and safely.
- Specify Load-Bearing Points: Clearly mark on the plot which platforms are intended to support heavy equipment or multiple performers to prevent structural issues. This is a critical safety consideration.
8. Found Space or Non-Traditional Configuration
A found space or non-traditional configuration transforms an unconventional venue, like a warehouse, art gallery, or outdoor clearing, into a unique performance area. This approach abandons the formal structure of a theater, instead using the location’s inherent character to create an immersive and memorable audience experience. The performance becomes part of the environment, not just a show on a stage.
This setup is central to site-specific art, large outdoor festivals like Coachella, and immersive theater from companies like Punchdrunk. For musicians, it offers a chance to create a one-of-a-kind event that connects with an audience on a deeper level by breaking down the traditional performer-spectator divide.
Strategic Analysis and Application
The primary challenge of a found space is its lack of built-in infrastructure. Unlike a concert hall, it has no permanent sound system, lighting rig, or power grid. Therefore, the stage plot for a non-traditional venue is less about arranging gear on a pre-existing stage and more about building the entire performance environment from the ground up.
Every technical detail, from power distribution and cable runs to audience flow and safety, must be meticulously planned. The stage plot becomes part of a larger technical rider and site plan, dictating where to place generators, portable stages, and even restrooms. The venue's unique acoustics and physical layout will heavily influence equipment choice and placement.
Key Takeaway: For a found space, the stage plot expands into a comprehensive site plan. The goal is to build a functional and safe performance ecosystem that leverages the venue’s unique atmosphere without being compromised by its limitations.
Actionable Tips for Found Space Stage Plots
To develop effective stage plot examples for non-traditional spaces, prioritize logistics and adaptability.
- Conduct a Thorough Site Survey: Before drafting any plot, visit the location to measure dimensions, identify power sources (or lack thereof), assess ground stability, and note potential acoustic challenges like echoes or external noise.
- Plan for Power and Safety: Your plot must include a detailed power distribution plan, indicating generator placement and required cable lengths. Clearly mark fire exits, emergency access routes, and first aid stations.
- Design for Audience Flow: Use the stage plot to map how the audience will enter, move through, and exit the space. Consider sightlines from all potential standing or seating areas to ensure a good experience for everyone.
- Specify All Infrastructure: Since nothing is standard, be explicit. Your plot should note the need for a portable stage, ground cover, tents for weather protection, and any required rigging for lights or sound equipment.
8-Configuration Stage Plot Comparison
| Configuration | 🔄 Complexity | ⚡ Resource Needs | ⭐ Effectiveness / 📊 Expected Impact | Ideal use cases | 💡 Quick tip |
|---|---|---|---|---|---|
| Thrust Stage | Medium — projection into audience, sightline planning required | Moderate — limited wing/backstage, modest tech | ⭐⭐⭐⭐ — high intimacy, strong actor focus | Classical plays, intimate dramas, mid-size venues | Design for 360° visibility; keep scenery minimal |
| Proscenium Arch | High — extensive rigging, fly systems, masking | High — full backstage, professional lighting/sound | ⭐⭐⭐⭐⭐ — optimal for large-scale, technical productions | Opera, musicals, Broadway-style shows | Use fly system and effective masking for scene changes |
| Arena (In-the-Round) | Medium — complex blocking, no conventional wings | Moderate — portable scenic/lighting needs, acoustics challenging | ⭐⭐⭐⭐ — maximum intimacy, limited scale for effects | Small theatres, experimental work, actor-focused pieces | Block omnidirectionally; plan multiple entrances/exits |
| Black Box | Medium — reconfigurable but requires technical skill | Low–Moderate — moveable seating and lighting rigs | ⭐⭐⭐⭐ — very adaptable; ideal for experimentation | Emerging artists, workshops, educational productions | Invest in modular staging and clear reconfiguration protocols |
| End Stage | Low — straightforward layout, simple logistics | Low — minimal tech and setup time | ⭐⭐ — efficient and practical, less intimate | Community centers, schools, lectures, multipurpose halls | Angle side seating and elevate stage to improve sightlines |
| Traverse Stage | Medium — dual-perspective blocking, narrow corridor | Moderate — limited scenery, careful sound design | ⭐⭐⭐ — unique dynamics, good for intimate/exploratory work | Avant‑garde, experimental venues, educational exercises | Block actions to engage both audience sides equally |
| Flexible Modular Stage | High — assembly complexity, trained crew needed | High — initial investment, storage and maintenance | ⭐⭐⭐⭐ — highly versatile across formats and scales | Multi-use venues, touring productions, regional theaters | Create standardized templates and train all technical staff |
| Found / Non‑Traditional | High — site surveys, permits, safety planning | Variable — often low fixed infrastructure, needs portable systems | ⭐⭐⭐⭐ — memorable, site-specific impact; unpredictable variables | Immersive theatre, festivals, site‑specific performances | Conduct thorough site and safety assessments; plan contingencies |
Beyond the Diagram: Making Your Stage Plot Work for You
Throughout this guide, we've moved beyond a superficial glance at stage plot examples. We have deconstructed them, analyzing the strategic decisions behind every symbol and placement for various stage configurations, from the intimacy of a black box to the grand scale of an arena. You've seen how a solo acoustic artist communicates different needs than a full-throttle rock band, and how a DJ’s setup demands its own specific language.
The core lesson is this: a stage plot is far more than a simple map of your gear. It is a professional handshake, your first and most critical piece of communication with the technical team responsible for bringing your sound to life. It’s a document that conveys competence, foresight, and respect for the crew’s time and expertise. A clear, accurate, and detailed stage plot sets a positive tone for the entire day, minimizing setup friction and maximizing performance quality.
From Static Image to Dynamic Tool
The journey from a blank page to a functional stage plot involves more than just dragging and dropping icons. It's about translating your artistic and technical needs into a universally understood visual language.
- Clarity is King: As we saw in the trio and full band examples, ambiguity is the enemy. Vague labels like "amp" or "mic" are useless. Specifying "Fender Twin Reverb, Stage Left" or "Vocal Mic, SM58 on Boom Stand, Center Stage" removes all guesswork.
- Anticipate Needs: The best stage plot examples anticipate the venue's questions. Where do you need power drops? How many DI boxes are required? Which monitor mix goes to which musician? Answering these questions in your plot saves immense time during soundcheck.
- The Technical Rider is Your Ally: Your stage plot provides the where; your technical rider provides the what and why. They are two halves of a whole. Always pair your visual plot with a detailed rider that lists your full input list, backline requirements, and hospitality needs.
Think of your stage plot not as a static document, but as a living blueprint for your live show. It should evolve with every new piece of gear, every lineup change, and every lesson learned from a previous gig.
Actionable Next Steps for a Flawless Performance
Now that you're armed with a wealth of stage plot examples and the strategies behind them, it's time to put this knowledge into action.
- Audit Your Current Plot: If you already have a stage plot, review it with a critical eye. Is it clear? Is it up to date? Does it use standard symbols? Use the templates and examples from this article as a benchmark to identify areas for improvement.
- Choose the Right Tool: Select a stage plot creator that fits your needs. Whether it's a simple drag-and-drop web app or more robust design software, find a tool you can easily update.
- Incorporate Modern Elements: Consider how to represent all aspects of your show. Beyond the traditional instruments and backline, modern stage plots often incorporate advanced visual components, such as indoor LED wall panels, which require specific data and power considerations noted on your plot.
- Practice Proactive Communication: Your responsibility doesn't end when you email the plot. Send it to the production manager or talent buyer at least a week before the show. Follow up to confirm they've received it. Bring several printed copies with you on the day of the show for the sound engineer and monitor tech.
By mastering your stage plot, you are taking direct control of your live sound. You are empowering the technical crew to do their best work, which in turn empowers you to deliver an unforgettable performance. This small investment of time and attention pays enormous dividends, creating a ripple effect of professionalism that elevates your reputation and ensures your music is heard exactly as you intend. You're not just organizing gear; you're engineering a successful show from the ground up.
Ready to take the next step in professionalizing your music career? Once your live show is dialed in with a perfect stage plot, manage all your assets with OohYeah. Our platform helps artists sell commission-free music, merch, and gear directly to fans, putting the power back in your hands. Get organized and get paid at OohYeah.