Your Guide to Recording in a Studio
Unlock your best sound with our guide to recording in a studio. Learn pre-production, tracking, and post-production secrets for a successful session.
November 26, 2025
Music Marketplace Advisor
Buying & SellingRecording in a studio is where your creative ideas get real. It’s the process of taking what’s in your head and turning it into a polished, professional-sounding track using top-tier gear in an acoustically treated space, often with an engineer at the helm. This is how you make sure your music, podcast, or voice-over is ready for the world.
Your Blueprint for a Successful Studio Session
Walking into a professional recording studio for the first time can feel daunting, but it doesn't have to be. A great session isn't just about hitting "record"—it's about bringing your vision to life efficiently, without blowing your budget. The secret is to treat it like a well-structured project with distinct phases.
The entire process of recording in a studio really boils down to three main stages. Get these right, and you're setting yourself up for a win.
- Pre-Production: This is all your homework. It’s the planning, the rehearsing, locking in arrangements, figuring out tempos, and making rough demos so everyone involved knows the game plan before the expensive studio clock starts.
- Tracking: This is go-time. It’s the actual performance and capture of every sound—the vocals, the guitars, the drums, every individual element that makes up your track.
- Post-Production: Here’s where the magic happens after the recording is done. It involves editing all the takes, mixing the different tracks to create a cohesive sound, and finally, mastering the song to get it ready for release.
Why This Framework Matters
Thinking in these three stages gives you a clear roadmap. It helps you manage your time and money, articulate your creative goals to the engineer, and sidestep those common mistakes that can eat up a session. When you prepare properly, studio time stops being a gamble and becomes a smart investment in your work.
And this kind of preparation is more crucial than ever. The global sound recording industry is massive, projected to hit $6.2 billion in 2025. Here in the U.S., the number of studios has jumped by 6.2% since 2020, with over 25,000 businesses now in operation. That means more choices for you, but it also means you need to be prepared to make the most of your opportunity and stand out.
A well-planned session respects both your art and your wallet. The most successful artists don't just show up to record; they show up to execute a plan they've already perfected.
Setting the Stage for Quality
At the end of the day, the goal is always to capture the best possible sound at the source. That starts with knowing your material inside and out, but it also comes down to the gear. The right equipment is fundamental, and a great place to start is understanding the basics, like choosing the best microphones for podcast recording—many of the principles for capturing a great vocal performance apply to almost any sound source.
Armed with that knowledge and a solid plan, you can walk into any studio with the confidence to create something incredible.
Mastering Pre-Production Before You Arrive
The single biggest factor in a successful studio session is decided long before you ever set foot in the control room. I’ve seen it time and time again: the bands that get amazing results are the ones who do their homework. This is called pre-production, and it’s where you lay the entire foundation for a smooth, creative, and cost-effective recording day.
Think of it this way: pre-production is where you make all the critical decisions when the clock isn’t ticking at $100+ an hour. Showing up unprepared with half-baked arrangements is the fastest way to burn through your budget and walk away frustrated.
Lock In Every Musical Detail
Before you even think about booking time, your songs need to be finished. Not “almost there,” but truly, unequivocally done. Every piece of the puzzle, from the first note to the final fade, should be decided.
This is your chance to answer the tough questions that will dictate the entire session:
- Song Structure: Are the verse, chorus, and bridge lengths locked? Do you know exactly where that guitar solo is supposed to kick in?
- Key and Tempo: Have you found the perfect key for the singer’s voice? Is the tempo (BPM) set in stone? You should have practiced these songs to a click track until it's second nature.
- Instrumentation: Who plays what, and when? Debating whether to add a synth pad or a harmony guitar part is a conversation for your rehearsal space, not the studio floor.
Nailing these details down beforehand frees up valuable mental space during the session. It lets you and your engineer focus on the performance and the sound, not on basic songwriting.
Create Your Session Roadmap
With the music finalized, your next job is to create a clear roadmap for the engineer. The most powerful tool for this is a well-made demo. It doesn't need to be a glossy, radio-ready production, but it must clearly communicate the song's structure, tempo, and vibe.
This demo becomes the blueprint. It gets everyone on the same page instantly, allowing the engineer to plan mic placements, anticipate transitions, and make technical choices that serve your vision from the get-go.
Along with the demo, you'll want to get a few key documents in order. It's not about creating a mountain of paperwork; it's about giving the engineer the essential info they need to keep things moving.
A studio session without a clear plan is just a very expensive rehearsal. Your pre-production work is what transforms studio time from an expense into a strategic investment in your music.
The Studio Pre-Production Checklist
Walking in with organized materials isn't just about being efficient; it shows you're a professional who respects the process. A little prep work here goes a long, long way. This checklist will ensure you’ve covered all your bases before you hit the "record" button.
| Task | Status (Not Started / In Progress / Complete) | Notes & Details |
|---|---|---|
| Finalize Song Arrangements | Complete | Every section (verse, chorus, etc.) is defined and practiced. |
| Set Final Tempo (BPM) | Complete | Practice extensively with a metronome to lock in the groove. |
| Confirm Song Key | Complete | Ensure the key is comfortable for the vocalist and fits the song. |
| Create a Demo/Reference Track | Complete | A simple recording to guide the engineer on structure and feel. |
| Prepare Lyric Sheets | Complete | Print clean copies for the vocalist and engineer. |
| Write Out Chord Charts | In Progress | Simple charts for rhythm players (guitar, bass, keys). |
| Create a Basic Track Plan | Not Started | A list of instruments to be recorded, and in what order. |
| Test and Prep All Gear | In Progress | New strings, new drum heads, check all cables and pedals. |
| Schedule Rehearsals | Complete | Run through the material as if it were a live performance. |
Once you have these items checked off, you're not just ready—you're set up for success. This preparation empowers your engineer to become a true creative partner, focusing their energy on capturing incredible sounds instead of trying to sort out logistics. This is how professional records get made.
Navigating Your Tracking Session Like a Pro
All that pre-production work is about to pay off. You’re ready for the main event: the tracking session. This is where meticulous planning lets you forget the logistics and just perform. Stepping into a professional studio, surrounded by top-tier gear and guided by an experienced engineer, creates an environment where you can truly capture your best work.
The secret to a great tracking day is a mix of collaboration and trust. Your relationship with the engineer is everything. You've got the vision; they've got the technical chops to translate it into sound. Be crystal clear about your goals, but stay open to their ideas. These folks live and breathe this stuff and can often pull a rabbit out of a hat with a technique you'd never have considered.
This is why having your pre-production locked down before you even walk through the studio door is so critical.
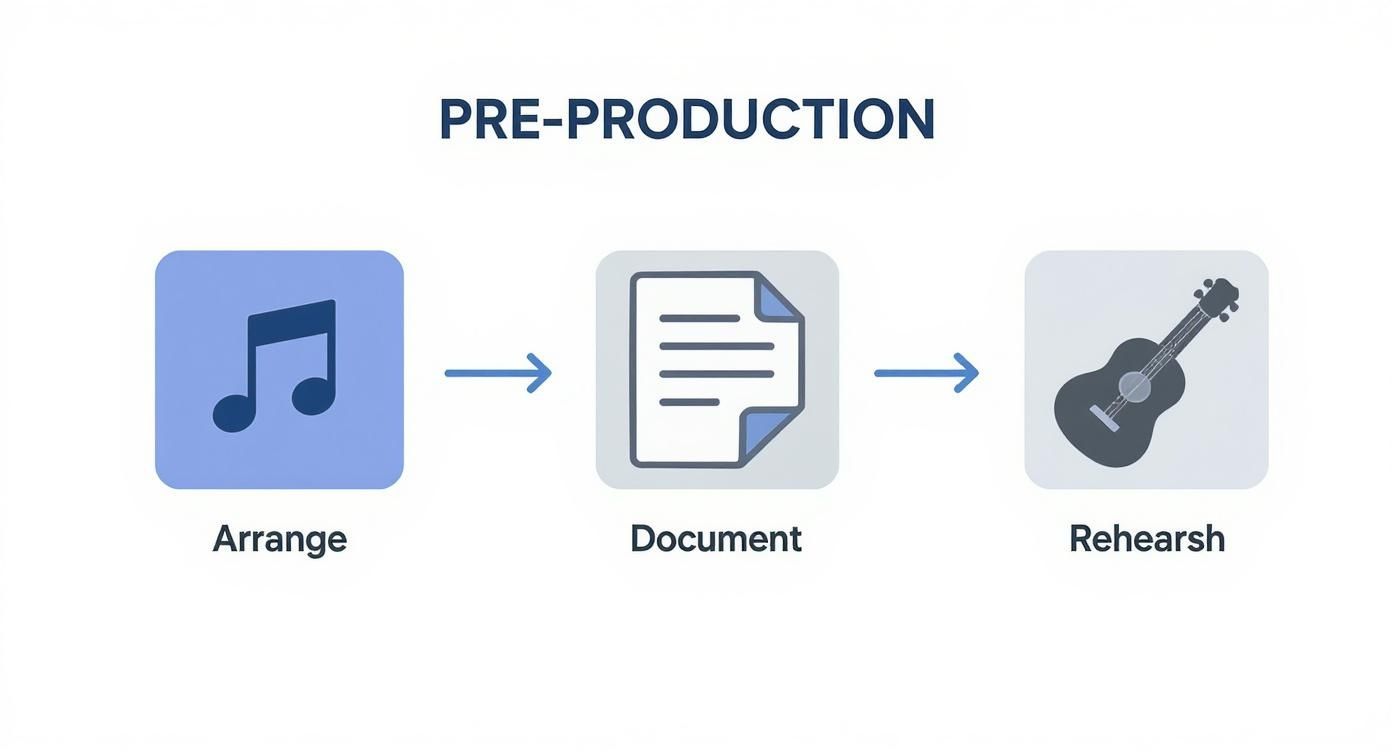
Finalizing arrangements, documenting the plan, and rehearsing relentlessly build the foundation that makes your studio time count.
Setting Up for Success
Expect the first hour or so to be all about setup. The engineer will be placing microphones, dialing in levels, and getting a feel for your sound. They're choosing mics based on the instrument, the tone you're after, and the room's unique acoustics. Don't be shy—ask them why they picked a certain mic. Understanding their thought process is not only fascinating but also helps build that crucial collaborative spirit.
A huge part of this initial phase is getting your headphone mix right. This is your world while you're performing, and it absolutely has to feel good. What you hear in your cans can make or break a take. Some singers need their voice swimming in reverb to feel it, while a drummer might just need the click and bass cranked to lock in.
Speak up and tell the engineer exactly what you need to hear to feel confident. A bad headphone mix can kill a performance before it even starts, so don't rush this part.
The Art of Capturing Killer Takes
With everything dialed in, it's go time. The red light is on, and the focus shifts entirely to performance. The goal isn't just to play the right notes; it's to capture takes that are dripping with emotion and energy. It's easy to freeze up under pressure, but a few simple strategies can keep the session moving.
- Start with the Rhythmic Foundation: Most of the time, you'll track drums and bass first. A tight, locked-in rhythm section is the bedrock of any great song.
- Layer with Guitars and Keys: Once that foundation feels solid, it's time to build the world around it with rhythm guitars, keyboards, and other harmonic elements.
- Focus on One Section at a Time: If a full pass of the song feels daunting, break it down. Just nail the verses. Then, move on to the choruses. This builds momentum and keeps everyone's morale high.
Remember to take breaks! Recording is a mental marathon. Stepping out of the room for a few minutes can reset your ears and your mind. Keep water and some light snacks handy to avoid those energy slumps that can creep in during a long session.
Trust your gut. You’ll often feel it when you’ve just laid down "the one." Don't be afraid to tell your engineer, "I think that's the take." They're your guide, but at the end of the day, you're the final judge of your own performance.
Embracing the Power of Technology
Modern studios offer a level of flexibility that was pure science fiction a few decades ago. The move to digital recording, which really took hold in the late 1970s and 1980s, blew the lid off the physical limitations of tape. Suddenly, you had a virtually unlimited number of tracks, constrained only by computing power. You can dive deeper into this massive shift by reading up on the history of sound recording.
This power means you can "punch in" to fix a single flubbed note without re-recording a perfect performance. It also lets you create a "comp" track—stitching together the best bits from several different takes to create one flawless version. This isn't cheating; it's just using the tools at your disposal to create the best possible record.
Sometimes, a track needs something you can't quite provide yourself. If a guitar solo or a bass line just isn't landing, bringing in a session musician can be a game-changer. They can bring a fresh perspective and a world-class skill set that can save hours of frustration. If you're considering this, check out this guide on how much a session musician earns and the value they add.
Ultimately, a killer tracking session is a potent cocktail of preparation, performance, and partnership. Arrive ready, communicate openly with your engineer, and trust the process. That's how you capture the magic that will become the heart of your record.
Capturing a Powerful Vocal Performance
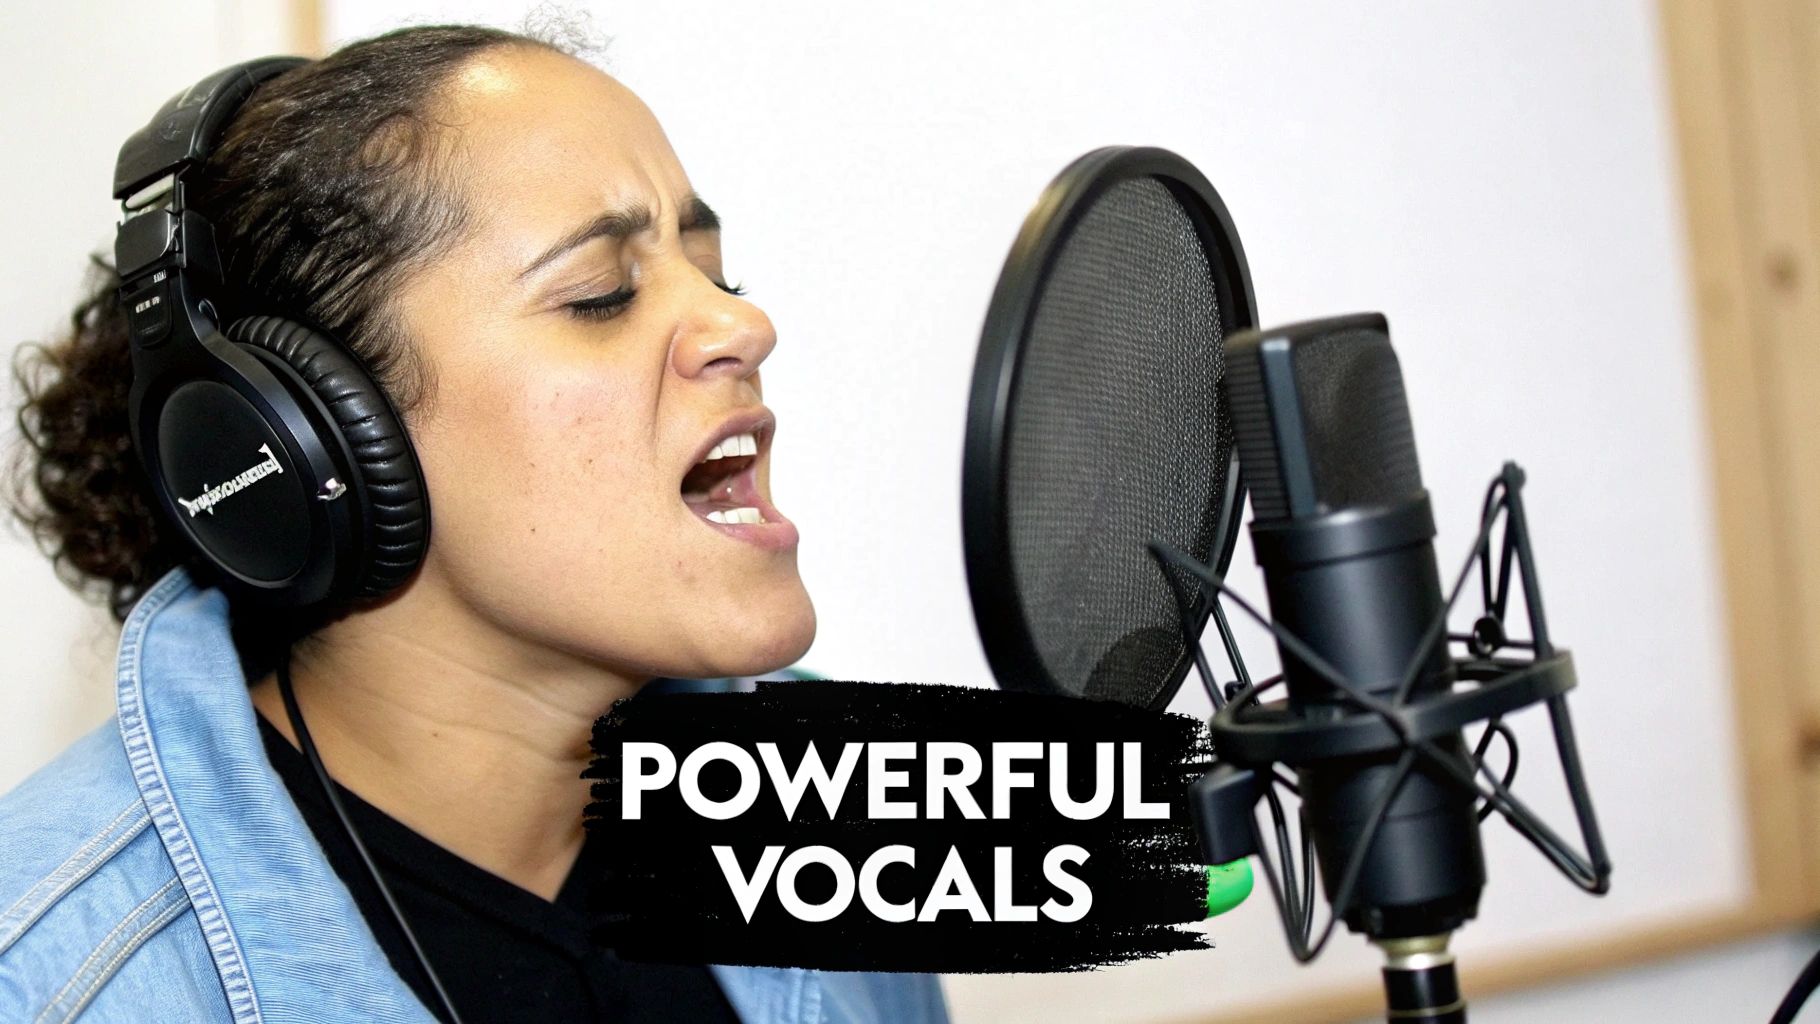
More than any other element, the vocal is the emotional core of your song. It's the most direct line to your listener, so getting a genuine, powerful performance is everything. This isn't just about hitting the right notes; it's about making someone feel the story you're telling.
Getting that magic take is a mix of physical readiness and a strong mental game. Even the most seasoned singers feel the pressure when that red light flicks on. The trick is to build an environment—both in the room and in your head—that lets your most authentic voice come through.
Preparing Your Voice and Mind
Your voice is an instrument, plain and simple. You wouldn't expect a guitarist to record with old, rusty strings, and you shouldn't walk into the vocal booth cold. A proper warm-up gets your vocal cords ready for a long session, helping you avoid strain while improving your control and range.
Carve out at least 15-20 minutes for some gentle exercises before you even think about stepping up to the mic:
- Lip Trills: Often called "lip bubbles," this is a fantastic way to get your breath support connected without putting any real stress on your vocal folds.
- Gentle Hums: Humming down a scale helps you physically feel the resonance in your face and chest. It's a great way to connect your body to the sound you're making.
- Sirens and Slides: Smoothly sliding your voice from your lowest comfortable note to your highest is the perfect way to stretch your range without forcing anything.
Beyond the physical side, your mindset is a huge piece of the puzzle. "Red light fever" is a real thing. To fight it, stop thinking about technical perfection and start focusing on the emotion of the song. Close your eyes. Picture the story you’re telling. Sing to a person, not a piece of gear. This one mental shift can turn a stiff, anxious performance into something truly moving.
Mastering Microphone Technique
How you work the mic is a performance in itself. A good studio condenser mic is incredibly sensitive, picking up every tiny detail—which is something you can use to your advantage. This is your first chance to add dynamics and texture to the track before a single plugin is loaded.
The most important concept to grasp is the proximity effect. In short, the closer you get to the mic, the more bass and intimacy you introduce into your vocal tone.
- For a quiet, breathy verse, get right up on the mic.
- When you're belting a huge chorus, back off a few inches. This not only prevents clipping but also acts as a natural form of compression, balancing the track's dynamics.
Don't overlook the pop filter, either. A good starting point is to place it a hand's width from the mic. This will catch those harsh "p" and "b" sounds (plosives) without smothering the high-frequency air that gives your voice its clarity.
Your job in the vocal booth isn't to be perfect—it's to be authentic. The most memorable vocal performances are the ones that are raw, honest, and full of human emotion. Let go of the need for flawless takes and focus on telling the story.
The Art of Comping a Master Vocal Track
Let's be clear: it is incredibly rare for a final vocal to be one single, perfect take. The industry standard is comping (short for compiling), which is the art of building one seamless, knockout performance from the best moments of multiple takes.
Your engineer will handle the technical side, but understanding how it works will make you a much better collaborator. The process usually starts with recording several full passes of the song. Afterwards, you and the engineer will listen back, picking out the strongest phrases, words, or even syllables from each take.
Maybe the first line of the verse was killer in take two, but you delivered the last word with more soul in take four. The engineer will surgically edit those pieces together, creating a "composite" track that represents your absolute best performance. This is where raw takes get polished into something that sounds both powerful and emotionally cohesive. By being an active part of this process, you ensure the final vocal is a true reflection of your vision.
Bringing It All Home: Post-Production and Final Delivery
Once you’ve captured every last take, it’s tempting to think you’re at the finish line. But in reality, you’ve just entered one of the most transformative stages of the entire process: post-production. This is where your raw recordings get molded into a polished, professional track that’s ready for the world to hear.
Think of it as the final, crucial act of the creative process. Getting a handle on what happens during editing, mixing, and mastering will not only demystify this phase but also help you communicate your vision clearly with your engineer, ensuring the end result is exactly what you heard in your head.
Decoding the Post-Production Workflow
Post-production is really a process of refinement, like a funnel. You start with a mountain of raw audio tracks and carefully shape them at each step until you’re left with one perfect master file. Skipping a step or rushing the process can seriously undermine all the hard work you’ve put in so far.
Here’s how it usually breaks down:
Editing: This is the deep clean. The engineer meticulously goes through every track, tightening up timing, cutting out any unwanted noises like a breath before a vocal line or the hum from a guitar amp, and "comping" together the best parts of multiple takes to create a single, flawless performance. It’s also where subtle pitch correction might be applied to make sure a vocal sits perfectly in key.
Mixing: Now, the engineer puts on their artist hat. Mixing is all about balance and emotion. They use a whole toolkit—faders, panning, EQ, compression, and effects like reverb or delay—to blend every individual track. The goal is to give each instrument its own space in the sonic landscape so the song feels cohesive, powerful, and clear.
Mastering: This is the final coat of polish and quality control. A mastering engineer takes the single stereo mix file and applies subtle tweaks to optimize its overall loudness, dynamic range, and tonal balance. Their job is to make sure your track sounds incredible on every system imaginable, from a high-end studio setup and car stereos to tiny earbuds.
Post-production isn't a magic fix for a bad performance; it's about elevating a great one. The cleaner and more solid your raw recordings are, the more your engineers can focus on creative enhancement instead of just performing audio first-aid.
How to Give Feedback That Actually Works
Once the engineer has a mix ready, the ball is back in your court. Providing clear, constructive feedback is absolutely essential to getting the sound you're after without getting stuck in a frustrating loop of endless revisions.
Vague notes like "the vocal feels weird" aren't helpful. Instead, get specific. Try something like, "Could we make the lead vocal a little brighter and more present in the chorus?" or "The snare feels a bit buried behind the rhythm guitars in the second verse."
Using a reference track is another pro move. Pointing to a specific song and saying, "I'm aiming for a kick drum sound that has the same punch and low-end as this track" gives your engineer a concrete sonic target. The more detailed you are, the quicker you'll arrive at a final mix that you absolutely love.
Understanding Your Final Files
When the master is finally approved, you’ll receive a set of final files. It's crucial to know what you’re getting and why, especially since digital streaming dominates everything. The recorded music market has shifted dramatically; paid subscription services drove the industry to new heights, bringing in $3.2 billion in the US in the first half of 2025 alone. That accounts for 84% of total market revenue. Your audio files have to be ready for this digital-first world.
Here are the essential formats you’ll work with:
| File Format | Best Use Case | Key Characteristic |
|---|---|---|
| WAV (44.1kHz, 16-bit) | CD Quality / Standard Streaming | The uncompressed industry standard for most digital distributors. |
| WAV (Higher Resolution) | Archiving / Hi-Res Audio | Often 48kHz/24-bit or 96kHz/24-bit for maximum fidelity. |
| MP3 (320 kbps) | Promotional Use / Email | A high-quality compressed file, perfect for sharing easily. |
Always, always ask for the high-resolution WAV files for your personal archives. These are your true masters—the highest quality versions of your art. For distributing to platforms like Spotify and Apple Music, the 16-bit, 44.1kHz WAV is the go-to standard. It’s also worth learning how to compress audio files without losing quality for when you need to create smaller files for promo. And if you're curious about just how much a great recording matters, you can learn more about how quality production affects music success in our detailed guide.
Common Questions About Recording in a Studio
Walking into a professional recording studio for the first time can feel intimidating. There's a lot to think about, from the budget and gear to the technical jargon and legal stuff. Getting these details sorted out before you walk through the door lets you relax and focus on what really matters: your performance.
Let's break down some of the most common questions artists have when they're gearing up for a session. Getting these answers straight will make the whole experience smoother and far more productive.
How Much Does Studio Time Cost?
Studio rates are all over the map. The price tag really depends on the city you're in, the quality of the gear, and the engineer's reputation. Knowing the general price brackets helps you build a realistic budget from the get-go.
Here’s a rough breakdown of what you can expect:
- Project Studios: These are often smaller, well-equipped setups, sometimes in a home environment. They're a fantastic option for artists on a tighter budget, typically running from $30 to $75 per hour.
- Mid-Level Studios: You'll find more established facilities with professionally treated rooms and a better selection of gear in this tier. Expect to pay somewhere between $75 and $150 per hour.
- High-End Studios: These are the legendary rooms with world-class equipment and a long list of famous clients. Rates can start at $200 per hour and climb well past $500.
Most studios also offer a "day rate"—a discounted price for an 8 or 10-hour block—which is almost always a better deal than paying by the hour. Just be sure to get a clear quote upfront that specifies whether the engineer's fee is included. You don't want any financial surprises.
For a more detailed look at the numbers, check out our guide on what it really costs to professionally record a song to help you plan with confidence.
What Should I Bring to the Session?
You've done the pre-production, so you know what you need. But a few things are absolutely essential. It goes without saying you need your instrument, but you always, always need a backup. A broken string, a dead battery, or a faulty cable shouldn't be the thing that brings your expensive session to a screeching halt.
Here’s a quick checklist for your gig bag:
- Instruments & Backups: Your main guitar, a spare, a fresh pack of strings, picks, and any specific pedals that are crucial to your sound.
- Your Notes: Bring digital or printed copies of your lyric sheets, chord charts, and tempo maps for the engineer.
- External Hard Drive: This is non-negotiable. You need it to take home a backup of your session files at the end of the day.
- Personal Comforts: Water, snacks, a phone charger—anything that keeps your energy and focus up. Sessions can be long.
Who Owns the Master Recordings?
This is easily one of the most important questions you can ask. The owner of the master recording—the original file created in the studio—is the person who controls how that song is licensed and used forever.
If you’re an independent artist paying for the studio time yourself, you should own the masters. Period. This needs to be spelled out in a simple "work for hire" agreement that you, the studio, and the engineer sign before a single note is recorded. This document prevents any confusion down the road and ensures you maintain full control over your art.
On the other hand, if a record label is paying for the session, their contract will almost certainly state that they own the master recordings.
Never assume ownership is just implied. A signed agreement is your only real protection and the mark of a true professional. It makes the rights clear for everyone involved and is standard industry practice.
What Is the Difference Between Mixing and Mastering?
People often use these terms interchangeably, but they are two completely different and equally vital stages of the process. Each requires a specific set of skills and a different way of listening.
Mixing is all about balance and emotion. It's the art of taking all the individual recorded tracks—the vocals, drums, guitars, bass, keys—and blending them into one cohesive song. A mix engineer uses tools like EQ, compression, and reverb to sculpt the sound, adjust levels, and make sure every instrument has its own space to shine. Think of it as painting a sonic picture.
Mastering is the final polish. A mastering engineer works with the final two-track stereo mix, not the individual tracks. Their job is to apply subtle, broad-stroke processing to optimize the song's overall loudness, tonal balance, and dynamic range. They make sure your track sounds great on everything from AirPods and laptop speakers to high-end studio monitors. It’s the final quality-control step that gets your music ready for release.
Ready to get your finished track out to the world? OohYeah provides the tools you need to sell your music, merchandise, and connect directly with fans, ensuring you keep more of your revenue. Take control of your career today at https://oohyeah.app.