Build Your Ultimate Recording Studio Room A Definitive Guide
Learn how to build a professional recording studio room with our definitive guide. We cover acoustics, soundproofing, layout, and gear selection.
December 19, 2025
Music Marketplace Advisor
Buying & SellingWhen you're building a recording studio, it's easy to get sidetracked by flashy gear. But the truth is, the room itself is your most important instrument. The entire process really boils down to two key principles: sound isolation (or soundproofing) to keep the outside world out, and acoustic treatment to control the sound inside the room.
Get these right, and you’ll create a space where your recordings are pristine and your mixes translate perfectly, no matter where they’re played.
Your Blueprint For A Professional Recording Studio Room

Putting together a pro-level recording studio room is as much an architectural project as it is an audio one. The mission is to create an environment that’s not just acoustically neutral but also a place where creativity can flourish. Before you even think about buying a single piece of foam, you absolutely need a detailed plan—a blueprint that maps out every single decision.
This plan is your roadmap. It’s what will save you from making expensive, time-consuming mistakes and ensure the finished room actually works. Of course, a plan is only useful if you can read it. For a solid primer on the basics, it’s worth spending some time understanding blueprints and how to read them.
Sound Isolation vs. Acoustic Treatment
I've seen it countless times: people sink their entire budget into the wrong thing because they confuse sound isolation with acoustic treatment. They are fundamentally different, and your plan needs to tackle both.
To put it plainly, one stops sound from getting in or out, and the other tames the sound that's already in the room.
To make this crystal clear, here’s a breakdown of how these two concepts differ and what they aim to achieve.
Core Pillars Of Studio Room Design
| Concept | Primary Goal | Common Methods |
|---|---|---|
| Sound Isolation (Soundproofing) | Prevent sound from entering or leaving the room. | Adding mass (e.g., multiple layers of drywall), decoupling structures (e.g., room-within-a-room), and sealing air gaps. |
| Acoustic Treatment | Control reflections, echo, and frequency buildup inside the room. | Absorption (bass traps, acoustic panels), diffusion (diffusers), and managing room modes. |
Getting this right is crucial for a usable space. You can't just pick one and hope for the best; a successful studio needs both.
The golden rule is simple: Isolate first, then treat. A beautifully treated room is useless if you can hear traffic noise or the air conditioner humming on every recording. Your first job is to create a quiet, blank canvas.
Planning For Success
This kind of careful planning is more important than ever. The home studio market is booming, with more people investing in proper room construction and gear. Market analysts see this sector growing from around USD 7.04 billion in 2025 to nearly USD 12.76 billion by 2034. That growth is being fueled by people spending serious money on the very things that make a studio perform correctly—from DAWs and monitors to professional-grade acoustic treatment.
Your blueprint needs to be exhaustive. I'm talking about everything from the final dimensions of the room down to where every single outlet and light switch will go. This level of detail also helps you stay on budget. To get a feel for how these costs fit into the bigger picture of a music project, take a look at our guide on what it really costs to professionally record a song in 2024.
This guide will follow that same blueprint approach, walking you step-by-step from an empty room to a fully optimized recording environment.
Choosing And Preparing The Right Space
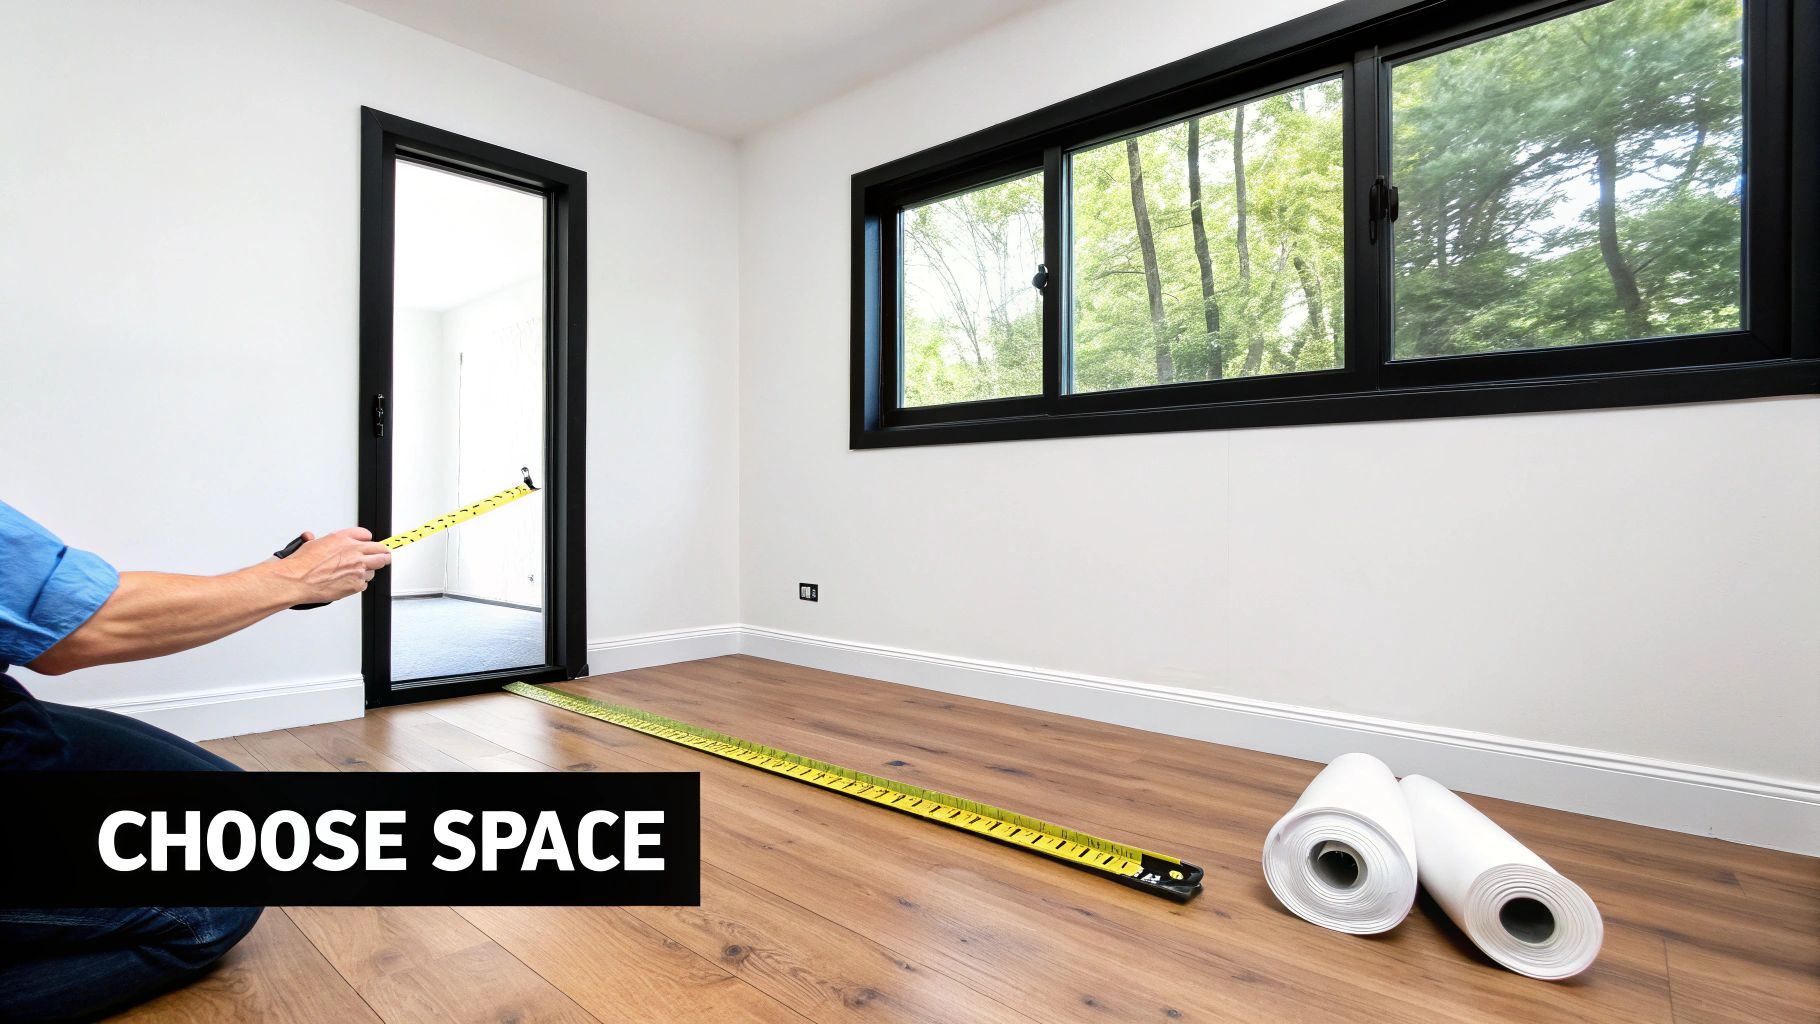
The foundation of every great recording isn't the microphone or the preamp; it's the room itself. Before you even think about buying gear or acoustic panels, your first job—the most important one—is to pick the right spot. The physical characteristics of your space will either be your greatest ally or your biggest obstacle, shaping every sound you capture.
A spare bedroom is a common starting point, but it's often a challenging one. You're usually dealing with standard drywall, shared walls with other living spaces, and potential noise bleeding in from a busy street. It's not a deal-breaker, but be prepared to put in serious work to get it properly isolated.
A basement, on the other hand, can be a fantastic blank canvas for a recording studio room. Those concrete walls and floors provide a ton of natural mass, which is a soundproofing secret weapon. Being underground also helps shield you from the outside world—traffic, lawnmowers, you name it.
Evaluating Potential Spaces
When you're looking at a room, you need to start thinking like an acoustician. The dimensions are everything, as they directly control how sound waves—especially those tricky low frequencies—behave.
Steer clear of rooms that are perfect cubes or where dimensions are simple multiples (like 10' x 10' x 10' or a 10' x 20' space with a 10' ceiling). These symmetrical layouts are a recipe for standing waves. This is where specific bass frequencies build up in some spots and completely disappear in others, creating an uneven and inaccurate low-end response. You'll go crazy trying to mix bass in a room like that.
Here’s a simple trick I’ve used for years to get a quick read on a room: the clap test.
Stand in the middle of the empty room and give a single, sharp clap. Now listen. Do you hear a tinny, ringing sound? That’s flutter echo, a dead giveaway of parallel, reflective walls. If the sound hangs in the air for a long time, you've got excessive reverb.
This little test gives you an instant snapshot of the room's character and a preview of the acoustic issues you'll be tackling later.
The Prep Work Before The Build
Once you’ve locked in your space, it’s time for prep work. Think of sound like water—it will find any crack or tiny opening to leak through. Your mission is to create a sealed environment, which means becoming a detective and hunting down every last air gap.
These are the usual suspects where sound loves to escape:
- Doorways: The gaps under and around a typical hollow-core door might as well be an open window for sound.
- Windows: Thin glass and poorly sealed frames offer almost no acoustic isolation.
- Electrical Outlets and Switches: These are basically open sound tunnels to the adjacent room.
- HVAC Vents: Air ducts can act like a telephone system, carrying sound all over the building.
Grab a few tubes of high-quality acoustic sealant and go to town. Meticulously fill every seam, crack, and gap around window and door frames, plus where the walls meet the floor and ceiling. For electrical boxes, you can get specialty putty pads that create an airtight seal behind the faceplate. This sealing phase is easily the most bang-for-your-buck soundproofing you can do.
As you get wrapped up in the technical details, never lose sight of the creative goal. A great room is just the starting point for making great music. To learn more about what comes after the mix is done, check out our guide on how to get my music heard.
The Real Science of Soundproofing a Studio
Let's get one thing straight: soundproofing isn't about slapping some foam or egg cartons on the wall. That's a common myth. We're diving into the physics of sound isolation, where the real goal is to build a sonic fortress that keeps unwanted noise out and your brilliant music in.
This is a serious step up from basic room prep. It's about ensuring your recordings are clean, professional, and free from the neighbor's dog barking or the rumble of a passing truck.
Mass, Decoupling, and Damping: The Big Three
Forget everything you think you know about acoustic foam stopping sound. Foam is for acoustic treatment—it tames echoes and reflections inside the room. To actually block sound from traveling through a wall, you need to master three core principles: mass, decoupling, and damping.
Mass is Your Best Friend
Heavy, dense materials are your first line of defense. Think about it: it's much harder for sound waves to vibrate a concrete wall than a flimsy piece of plywood. Sound is just vibration, so the more mass you put in its way, the more energy it loses trying to get through.
A classic, real-world trick is to double up on drywall. Instead of a single sheet of standard 1/2-inch drywall, professionals often use two layers of 5/8-inch Type X drywall. That simple addition adds significant mass, dramatically improving the wall's ability to block airborne noise.
Decoupling: Create a Break in the Path
Next up is decoupling. This means physically separating the two sides of a wall so vibrations can't find an easy path to travel through. It’s the core idea behind the "room-within-a-room" construction you see in high-end studios.
You’re essentially building a new set of walls, a ceiling, and maybe even a floor that "floats" inside the existing structure, with as few physical contact points as possible. Here’s how it’s done in practice:
- Isolation Clips: These are a game-changer. They're resilient rubber-and-metal clips that attach to your studs. A metal "hat channel" snaps into them, and your new drywall screws into the channel, creating an air gap that isolates it from the building's frame.
- Staggered-Stud Walls: This is a clever framing technique. Instead of a single row of studs connecting both sides of the wall, you use a wider base plate and stagger the studs. Each side of the wall gets its own set of studs, so there's no direct, rigid connection for sound to travel across.
Damping: Kill the Vibration
Finally, there's damping. This is the secret sauce. Damping involves using a special material to convert sound energy into a minuscule amount of heat, effectively killing the vibration.
This is usually done by sandwiching a viscoelastic compound between two rigid layers, like our two sheets of drywall. When sound hits the first layer, the gooey compound in the middle shears and dissipates the vibrational energy before it can really get the second layer moving.
I've seen fantastic results with products like Green Glue Noiseproofing Compound. It’s not actually glue, but a damping compound you apply between drywall layers. This mass-damping combo is one of the most cost-effective ways to boost a wall's Sound Transmission Class (STC) rating.
Building for the Real World
Achieving this level of isolation is a serious undertaking and a big reason why the professional studio industry is so robust. In fact, the commercial sound-recording studio market generated an estimated USD 6.2 billion in revenue for 2024–2025. That number really highlights the value placed on creating perfectly controlled audio environments. (Explore more insights on the sound recording studios market size at Kentley Insights).
For your own space, the practical goal is to achieve a very low noise floor. This is just the baseline level of ambient sound in your room when everything is silent. A low noise floor is what allows you to capture a delicate vocal or the subtle decay of an acoustic guitar without also recording the hum of the air conditioner or a conversation down the hall.
By strategically combining mass, decoupling, and damping, you can create that quiet, controlled space where the only sounds making it to your microphones are the ones you put there on purpose.
Mastering Your Room’s Acoustics With Strategic Treatment
With your recording studio room properly isolated from the outside world, you've essentially created a quiet box. Now comes the real challenge: taming the sound inside that box. This is where acoustic treatment comes in, a whole discipline dedicated to managing reflections, killing flutter echo, and smoothing out frequency response to build a listening environment you can actually trust.
Make no mistake, an untreated room will lie to you. Every time. Sound waves ricochet off hard surfaces like drywall, wood floors, and ceilings, creating a chaotic storm of reflections. This sonic mess smears your stereo image, masks details, and tricks you into making EQ and reverb decisions that sound great in your room but terrible everywhere else. Our goal is to manage these reflections so what you hear is a true picture of your mix.
Finding and Fixing Your Room's Acoustic Problems
Before you start hanging panels, you need to play detective. The most common villains in a small room are early reflections, excessive reverb, and low-frequency chaos. The good news is, you can identify these issues with your ears and some simple tools.
Ever tried the clap test? Just stand in the middle of your room and give a single, sharp clap. If you hear a "zinging" or ringing sound, that’s flutter echo. It’s caused by sound bouncing rapidly between two parallel, reflective surfaces—a classic problem in typical rectangular rooms.
For a more high-tech diagnosis, you can grab a measurement microphone and download the free software, Room EQ Wizard (REW). This powerful tool shows you a visual representation of your room's acoustic signature, pinpointing the exact frequencies that are booming (peaks) or disappearing (nulls). This data takes the guesswork out of the equation, allowing you to treat your room with surgical precision.
This diagram breaks down the core concepts behind soundproofing, which is the essential first step before you can even begin to think about internal room acoustics.
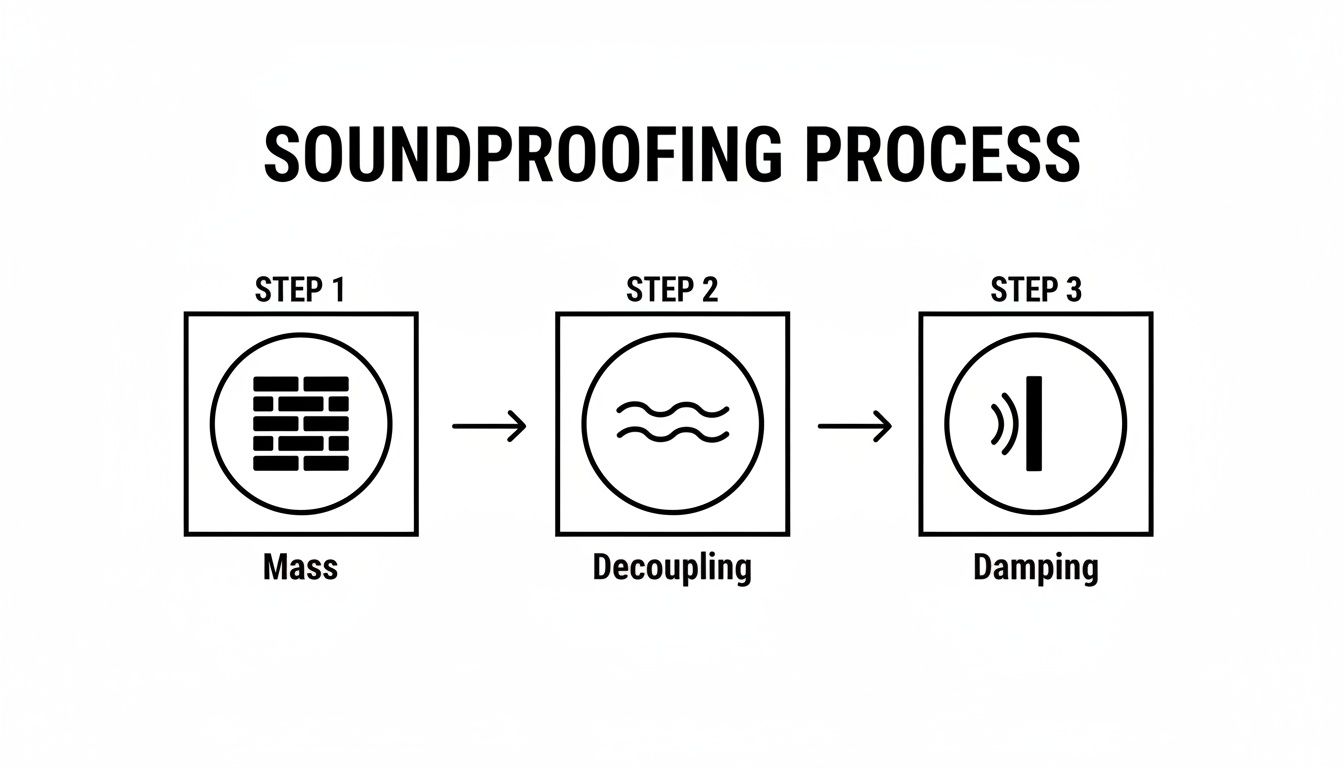
By adding mass, decoupling structures, and damping vibrations, you create the quiet "blank canvas" you need for your acoustic treatment to have any meaningful effect.
The Three Pillars of Acoustic Treatment
Controlling the sound inside your studio really boils down to three key tools. Each one has a specific job, and learning how to deploy them correctly is the secret to a balanced, professional-sounding space.
- Absorption: Think of this as your primary weapon for soaking up reflections and killing echoes. Absorbers, usually built from dense materials like mineral wool or fiberglass, work by converting sound energy into a tiny amount of heat. Your first move should be placing these at your first reflection points—the spots on your side walls and ceiling where sound from your monitors would bounce directly into your ears.
- Diffusion: While absorption removes sound energy from the room, diffusion scatters it. Diffusers feature complex, uneven surfaces that break up sound waves and disperse them in random directions. This is fantastic for taming flutter echo and standing waves without making the room sound completely dead and lifeless. It adds a sense of air and spaciousness.
- Bass Trapping: Low-frequency sound waves are long, powerful, and notoriously difficult to control. They love to pile up in the corners of your room, creating a muddy, boomy low end that will completely sabotage your mix. Bass traps are essentially extra-thick, dense absorbers specifically designed to tackle these troublesome low frequencies. They are, without a doubt, the most important element for getting a mix that translates well to other systems.
To get a clearer picture of how these elements work together, here’s a quick guide to the different types of treatments and where they fit into your studio design.
Acoustic Treatment Solutions
| Treatment Type | Primary Function | Ideal Placement Location |
|---|---|---|
| Broadband Absorber | Reduces mid-to-high frequency reflections and flutter echo. | First reflection points on side walls, ceiling ("cloud"), and back wall. |
| Bass Trap | Absorbs low-frequency energy to control boominess and nulls. | All vertical and horizontal corners of the room (floor-to-ceiling if possible). |
| Diffuser | Scatters sound energy to create a sense of space and prevent echo. | Back wall, ceiling, or any large, flat surface behind the listening position. |
This table provides a starting point, but every room is unique. The key is to use these tools in combination to achieve the right balance.
Remember, the goal isn't to create a completely dead, anechoic chamber. A great studio has a controlled but natural-sounding ambiance. It’s the skillful blend of absorption and diffusion that makes a room feel both accurate for mixing and inspiring for creating.
Ultimately, getting your room's acoustics right is just as important as choosing the right microphone or preamp. A well-treated room ensures your creative decisions are based on sonic reality, not acoustic illusions. If you're curious about how much these technical details really matter in the grand scheme of things, you might find our article exploring whether quality production affects music success to be an interesting read. By taking a methodical approach to treatment, you give your mixes the best possible chance to sound incredible everywhere—from a car stereo to a pair of earbuds.
Fine-Tuning Your Layout for Workflow and Monitoring
With your acoustic treatment in place, the room is ready to become a real studio. This next phase is all about turning an empty, treated space into an efficient, creative environment. How you arrange your gear isn't just about looking cool; it directly affects your workflow, your comfort, and, critically, the accuracy of what you’re hearing.
It all starts with your listening position. The entire goal is to create a monitoring "bubble" where you hear the music exactly as it is, without the room coloring the sound. The foundation for this is the equilateral triangle principle. It’s a classic for a reason: your two main monitors and your head should form the three points of a perfect triangle, with the speakers pointing right at your ears.
This simple setup is your key to a solid stereo image. When you get it right, a vocal panned dead center will sound like it’s coming from directly in front of you, not vaguely from somewhere in the middle. It’s the first step to getting the clearest possible picture of your mix.
Finding the "Sweet Spot"
Just setting up the triangle isn't enough. You have to place that entire setup—your desk, chair, and speakers—in the one spot in the room where the low-end is the most honest. This is the fabled "sweet spot."
A great place to start is by putting your desk against one of the shorter walls, so you’re facing down the longest part of the room. This gives bass waves more space to travel before they bounce back at you. Try to avoid setting up shop right in the dead center of the room or pushed all the way against the back wall. These are notorious problem areas where bass frequencies can build up or completely disappear.
Pro Tip: The "Bass Crawl" This might look a little silly, but it works. Play a sine wave sweep or a familiar, bass-heavy track on a loop. Get on your hands and knees and slowly crawl around the area you plan to sit. You'll hear the bass change dramatically. Listen for the spot where the low-end sounds the most even and defined—that's where you want to plant your chair.
Designing for Ergonomics and Workflow
Once you've nailed your monitoring, it's time to think about efficiency. A chaotic setup creates mental friction, and that’s a creativity killer. A smart layout should make the technical side of things feel effortless.
Think about your personal process and arrange your gear to match.
- Primary Gear: The tools you touch constantly—your audio interface, main MIDI keyboard, and monitor controller—need to be within easy arm's reach. No stretching, no leaning.
- Secondary Gear: Your outboard preamps, compressors, or synths you use less frequently can live in a rack to the side of your desk. They're still accessible but aren't cluttering up your main workspace.
- Cabling and Patch Bays: A tangled mess of cables is more than just ugly; it’s a workflow nightmare. A patch bay is a game-changer. By routing all your inputs and outputs to a central hub, you can re-patch your entire signal chain with a few short cables instead of crawling behind your racks.
It's All About the Vibe
Finally, don't sleep on the power of atmosphere. The right lighting and overall feel can make or break your creativity during a long session. To get this right, visualizing the space ahead of time can be a huge help. You can create surprisingly detailed mockups of your planned setup with tools like those found in the Top Architectural Rendering Software for Stunning Designs.
Try using warm, dimmable lights to set a relaxed mood. Add some focused task lighting, like small gooseneck lamps, for your desk and gear to reduce eye strain from screen glare.
This level of detail is what separates a good home studio from a great one. With the global recorded-music market hitting around USD 29.6 billion in 2024, the demand for high-quality production spaces is undeniable. As noted by IFPI.org, this is the tenth consecutive year of growth for the industry, showing just how much professional results matter. When you optimize your layout, you're not just organizing gear—you're building a purpose-built machine for creativity.
Got Questions About Your Studio Build? I've Got Answers.
Building a studio can feel like navigating a minefield of technical jargon and conflicting advice. Even the best-laid plans hit snags, and specific questions always seem to pop up right when you're in the middle of a build. Let's tackle some of the most common hurdles I see people face.
Getting these details right is what separates a frustrating money pit from an inspiring, functional creative space. Here's some straight talk on the real-world problems you're bound to encounter.
What’s the Absolute First Thing I Should Do?
Before you buy a single 2x4 or acoustic panel, your most critical first step is assessment and planning. You have to truly understand the space you're working with—its acoustic pros and, more importantly, its cons. This goes way beyond just measuring the room's dimensions.
Grab a sound level meter app for your phone and measure the room's ambient noise at different times. Is there a rumble from morning traffic? Can you hear the air conditioner kick on in the next room? You need to document every single one of these external noise sources.
Only after you have this data can you draft a realistic plan and budget. That plan needs to draw a very clear line between two totally different phases: soundproofing (isolation) and acoustic treatment (sound control inside the room). People mix these up all the time, spending a fortune on foam panels thinking they'll block noise, which they simply don't.
A smart plan always prioritizes building a quiet, well-isolated shell first. You can always add or adjust acoustic treatment later, but trying to fix a room with poor isolation after the fact is a massive, expensive, and often impossible job.
Can I Actually Treat a Room on a Shoestring Budget?
Absolutely. While there are some incredible high-end acoustic products out there, you can get phenomenal results with DIY solutions for a tiny fraction of the cost. The secret isn't throwing money at the problem; it's understanding the acoustic principles and using the right materials.
You can build your own broadband absorption panels that will outperform most of the commercial foam products you see online. It just takes a simple wooden frame, some dense mineral wool insulation (like Rockwool or Owens Corning 703), and breathable fabric to wrap it all up. These DIY panels provide far better absorption, especially in those muddy lower-mid frequencies that can ruin a mix.
When it comes to bass traps, the same logic applies: go big and dense. Just build thicker versions of the same panels and straddle them across the corners of your room, floor to ceiling if you can swing it. This is, without a doubt, the most cost-effective way to tame the powerful low-frequency energy that loves to build up in corners.
How Do I Know if My Room’s Acoustics Are Actually Good?
You’ll need to use a two-pronged approach: objective measurement and good old-fashioned critical listening. Using both gives you the full story.
For objective data, you can use a special measurement microphone with free software like Room EQ Wizard (REW). This setup will generate frequency response graphs and waterfall plots that show you exactly what's wrong. You can literally see the problem spots—like frequency buildups (resonances), deep cancellations (nulls), and how long sound is bouncing around (reverb time).
But the ultimate test is subjective. Put on some familiar, professionally mixed reference tracks you know inside and out.
- Does the bass sound tight and focused, or is it a boomy, undefined mess?
- Is the stereo image sharp and centered, or is it smeared and vague?
- Most importantly, do the mixes you make in this room translate?
If your tracks sound great on other systems—in your car, on earbuds, through laptop speakers—that’s the best sign your room is acoustically reliable.
What's the Biggest Mistake I Could Make?
I've seen it time and time again: the single biggest and most expensive mistake is underestimating sound isolation and confusing it with acoustic treatment. People will blow their entire budget on beautiful wood diffusers and custom fabric panels, only to realize their recordings are still being ruined by a passing truck and their neighbors are filing noise complaints.
Soundproofing is about mass and decoupling. It means real construction—adding layers of drywall with a damping compound like Green Glue between them, or using resilient channels to physically break the connection between walls. It's about stopping sound from getting in or out.
Acoustic treatment, on the other hand, just tames the sound reflections already inside the room. You have to handle isolation first. A quiet, isolated room with just a few DIY panels is infinitely more useful than a perfectly "treated" room that's plagued by noise pollution.
Ready to share your perfectly mixed tracks with the world? OohYeah provides a music-first ecosystem where you can stream, sell, and market your work directly to fans, keeping more of the revenue you earn. Take control of your career and connect with your audience on a platform built for artists. Learn more and sign up today at OohYeah.